Browse Category by Homemaking
Homemaking

Noblemen’s Favorite Pizza

Hello my friends! I’ve been missing my dear bungalow so much lately and just had to post something tonight. I decided to post a pizza recipe. Yes, I already posted Noble’s pizza recipe a while back. But I gotta say, we like this one even better. Why? Because it incorporates the use of cake pans, olive oil, and a high baking temperature, resulting in pizza that (we think) is similar in taste and texture to Pizza Hut.

Whenever I told my brothers I’d be making pizza for dinner using our original recipe, there would be a general positive response, but it wasn’t anything special. I wasn’t entirely satisfied with the recipe. Upon its announcement, I wanted my pizza to solicit tears of joy, whoops of ecstasy, and exclamations of anticipation from my food-loving brothers…okay, that was a little very exaggerated, but you get the idea. ;)

I got to wondering how exactly Pizza Hut and other pizza chains made their pizza so tasty, and I think it’s really that hot, crispy, oily crust. How could I make something like that and still keep it relatively healthy? Sub whole wheat flour and olive oil? I was eager to try, so I got the green light from mom, looked up a mock Pizza Hut recipe, tweaked it a bit, and got to baking.

Happily, it was a hit in our family and produced a crispy, flavorful crust with a tender interior. I will say, though, that 3 cake pans makes just enough for our family of 6, so if we’re feeding a crowd, I would use the former recipe. And this pizza will not win the beauty contest either. But if you want a special treat and don’t crave aesthetic perfection, give this one a try and I don’t think you’ll be disappointed. I don’t claim to have found the “best pizza recipe ever,” but I have found what works for our family and I hope you like it too! I decided to name this in honor of those special guys in my life who give me so much encouragement and fuel my motivation to make them yummy things.

Noblemen’s Favorite Pizza

Dough:
1 cup warm water
⅓ cup milk
1/2 teaspoon salt
3 cups whole wheat flour, freshly ground
1 tablespoon granulated sugar
2 1/4 teaspoons instant dry yeast (1 package) p
2 tablespoons olive oil (for dough)
9 tablespoons oil – 3 tablespoons per pan

Toppings:
1.5-2 cups pizza sauce (either canned or homemade)
Shredded mozzarella cheese
Toppings of your choice (I like our homemade sausage, mushrooms, olives, and anything else we have on hand)
Oregano and basil, for sprinkling

Directions:
Put yeast, sugar, and salt in a large bowl. Add water and milk; stir to mix well. Let rest for two minutes. Add oil and stir again. Add flour and stir until dough forms and flour is absorbed (dough will be a little sticky – just use some oil to keep it from sticking to your hands). Turn out on to a flat oiled surface and knead for about 10 minutes, until elastic and no longer sticky.

Divide dough into three balls. Put 3 Tablespoons of oil in each of three 9-inch cake pans, making sure it is spread evenly. Using a rolling pin, roll out each dough ball a little wider than the base of the pans. Place in cake pans. It’s okay if it doesn’t go all the way up the sides. Place in warm area and allow to rise for 1 to 1 1/2 hours.

Preheat your oven to 475°F. Meanwhile, distribute sauce, cheese, and toppings evenly on pizzas. I usually end up using 1/2 to 2/3 cup sauce per pizza. Cook until cheese is bubbling and outer crust is brown. It takes our oven exactly 16 minutes. Use a knife to loosen the edges and immediately transfer pizzas onto a wire rack. Cut each pizza into 6 wedges and serve hot. Enjoy!
Homemaking

Anniversary Dinner 2014

A tradition my brothers and I enjoy in our home is making our parents a special romantic dinner on their anniversary. It’s a neat way to honor them and show our appreciation for them. I know that my parents’ strong marriage and faithfulness to each other is one of the greatest blessings in my life and has given us stability through the thick & thin. I praise God for bringing them together and continue to marvel at their example of a godly marriage. Oh, and I absolutely looooove the story of how they met. Anyway, back to the anniversary. :)

I thought I would post pictures from this year’s meal to give you some ideas if you’re interested in doing the same:

IMG_7423

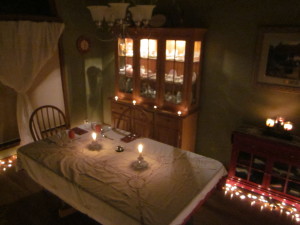
My brothers once again worked their decorating magic and turned this room into a romantic dining experience.

IMG_7424

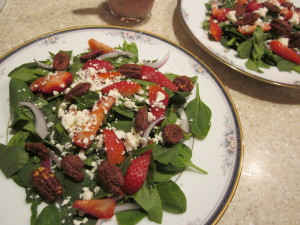
For the first course we served a strawberry salad with pecans, red onion, spinach, and feta cheese. I made candied pecans and a pink poppyseed dressing. You can find the recipe here.

IMG_7427

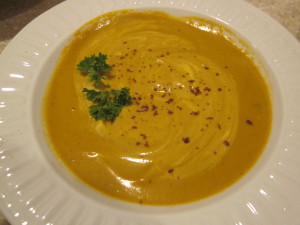
We served a pumpkin bisque for the second course. It was certainly unusual and tasty, although I’m not a huge fan of pumpkin. The coconut milk gave it creaminess and a delightful texture. I swirled in a bit of sour cream and sprinkled it with nutmeg and parsley just before serving. We served it with italian bread, buttered and broiled in the oven for a few minutes.

IMG_7430

The third and main course was stuffed salmon. I was very pleased with the results on this one. It’s an adaption of this recipe. I just cut the fillets of salmon in half and layered them with mustard, feta, spinach, seasonings and ricotta cheese. I covered and refrigerated them until I was ready to bake them. We served this with cottage cheese and sautéed green beans.

IMG_7425

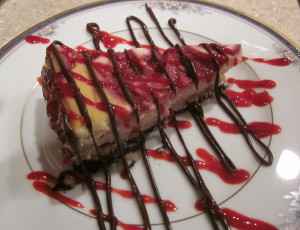
And for dessert, we served white chocolate raspberry cheesecake. It seemed to go over well and I really liked having it in the fridge ready to go.

IMG_7429

We banged a “gong” before every course. Wesley, as you can see here, took great delight in providing the sound effects. Hehe.

Additional tips and ideas:

~Choose a convenient date and time when planning the dinner. Make sure it works with everyone’s schedules. It doesn’t have to be on your parents’ actual anniversary. We did ours on a Sunday, which worked out well. We took 2 cars to church and afterwards the boys and I came home to start cooking/decorating while Mom and Dad enjoyed an afternoon to themselves. They arrived around 6 p.m. for dinner.

~While planning the menu, think about making foods that can be refrigerated overnight or kept warm in a crock pot. It will save you a lot of hassle and last-minute scrambling to have some of it already made and ready.

~After you’ve planned the menu, take a collection from your siblings for groceries. I bought almost everything at Aldi and was able to use some of what we had on hand, so we ended up keeping expenses under $30. If you spread that out between everyone, that’s really not bad at all.

~Delegate tasks to your siblings. Tasks include being in charge of a specific course, making the menu, or helping with decorations. Don’t try to do it all by yourself. Make sure everyone has a part…it’s much more fun (and less work on you!) that way.

~Have your younger siblings be waiters/waitresses. Austin and Jonathan decided to go for a unique style, with coat jackets, jeans, bare feet, and towels. I wish I had a picture for you. Needless to say, they were charming.

~Play your parents’ special “song” (if they have one) sometime during or at the end of the meal. You never know…they might just get up and start dancing. ;)

~Consider having dessert with your parents. After the final course has been eaten and dishes cleared, bring out enough plates for everyone and enjoy the sweet finale together.

~Do you have old photos or videos of their wedding? This would be a delightful conversation piece or activity. Our parents had their wedding video-taped and it is SO special to watch. However you decide to do it, an anniversary dinner will not only bless & honor your parents, but will make lasting memories for the years to come.

Homemaking

My Favorite Whole Grain Chocolate Chip Cookies

Yes, it’s another cookie recipe. But may I also mention that it’s one of the BEST cookie recipe I’ve come across and that I’m super excited about it? I think you’ll be excited about this one, too, especially if you delight in making “secretly healthy” food….

IMG_2717

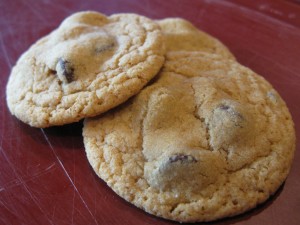
I was *thrilled* to find a completely whole grain chocolate chip cookie recipe that actually tasted this good. Brother approved and all! I have long sought after a cookie recipe that is whole wheat and compares with all-white flour recipes. This is my new go-to cookie recipe when we need cookies and I doubt I’ll need another one. Why do these taste so good and look so beautiful AND manage to be whole grain?

The secret?

Oat flour! I am much indebted to the genius of a baker who thought to powder oats in the blender and use it for flour. Using a mix of whole wheat flour and oat flour, you can achieve a perfect texture and amazing taste every time.

IMG_2721

This is a large batch and makes lots of cookies – between 5 and 6 dozen. Make up a bunch, serve them warm with milk, pop any leftovers in the freezer and see how long they last. It won’t be long, I’ll betcha anything. ;)

Whole Grain Chocolate Chip Cookies

Ingredients:

1 ½ cups butter, softened
1 ½ cups white sugar
1 ½ cups brown sugar
3 eggs
1 Tablespoon vanilla
¾ tsp. salt
1 ½ tsp. baking soda
1 ½ tsp. baking powder
3 cups whole wheat flour
3 ¾ cups rolled oats, powdered for a few seconds in your blender
1 ½ bags (3 cups) dark chocolate chips

Preheat oven to 375 degrees. Line a baking sheet with parchment paper and set aside.

In the bowl of a mixer, cream butter and sugar. Add the eggs and vanilla and beat until light and fluffy, about 3-4 minutes. Add salt, soda, baking powder, oat flour, and whole wheat flour and mix. The dough will be fairly stiff at this point. Mix in the chocolate chips.

Place rounded tablespoons of dough on parchment-lined cookie sheets. Bake in a 375 oven for 8 minutes. Do not overbake, they will firm up as they cool. Let sit on the cookie sheet for a few minutes before transferring to a wire rack.

Enjoy!